הכרת הלשונית Modular Units (Hardware)
ראו מה הלשונית Hardware מציגה עבור כל ארונית, כיצד השורות מקובצות, וכיצד לבדוק פרטי קידוח של לוח.
In a work order's Modular Units page, each unit has two tabs: Panels (default) and Hardware, with the tab label showing the live count, e.g. 'Hardware (12)'. The Hardware table columns are Sno, Sku Name, Serial Number, Model Number, Dimension, Qty, Unit, Source and Details. Rows are grouped: the same SKU with the same dimension and the same source becomes one row, and the Details column concatenates every distinct reference that contributed (for example all connector applicators or panels using that SKU, comma-separated; long values are truncated with a hover tooltip). Length-based hardware such as skirting or profiles shows total consumed length rather than piece count, so it matches the Raw Materials output. Hardware sold in sets (per-set SKUs) is counted in sets rather than pieces, so the per-unit figures add up to the Raw Materials totals. Only units marked for production appear on the page at all — a 'missing cabinet' here usually just isn't marked for production. An empty tab shows a 'No hardware' placeholder with the message 'This unit has no hardware items.' The 3D viewer pane is not rendered at all while the Hardware tab is active. The list also respects the work scope: hardware on out-of-scope elements is not counted. Serial Number is the SKU's ERP code from the catalog.
בעמוד Modular Units של הזמנת העבודה, הלשונית Panels של כל ארונית מפרטת את הלוחות הבודדים שלה (שמאל, ימין, תחתון, גב, מסילה עליונה וכו').
✓ נבדק במוצר ב-19 באוקטובר 2026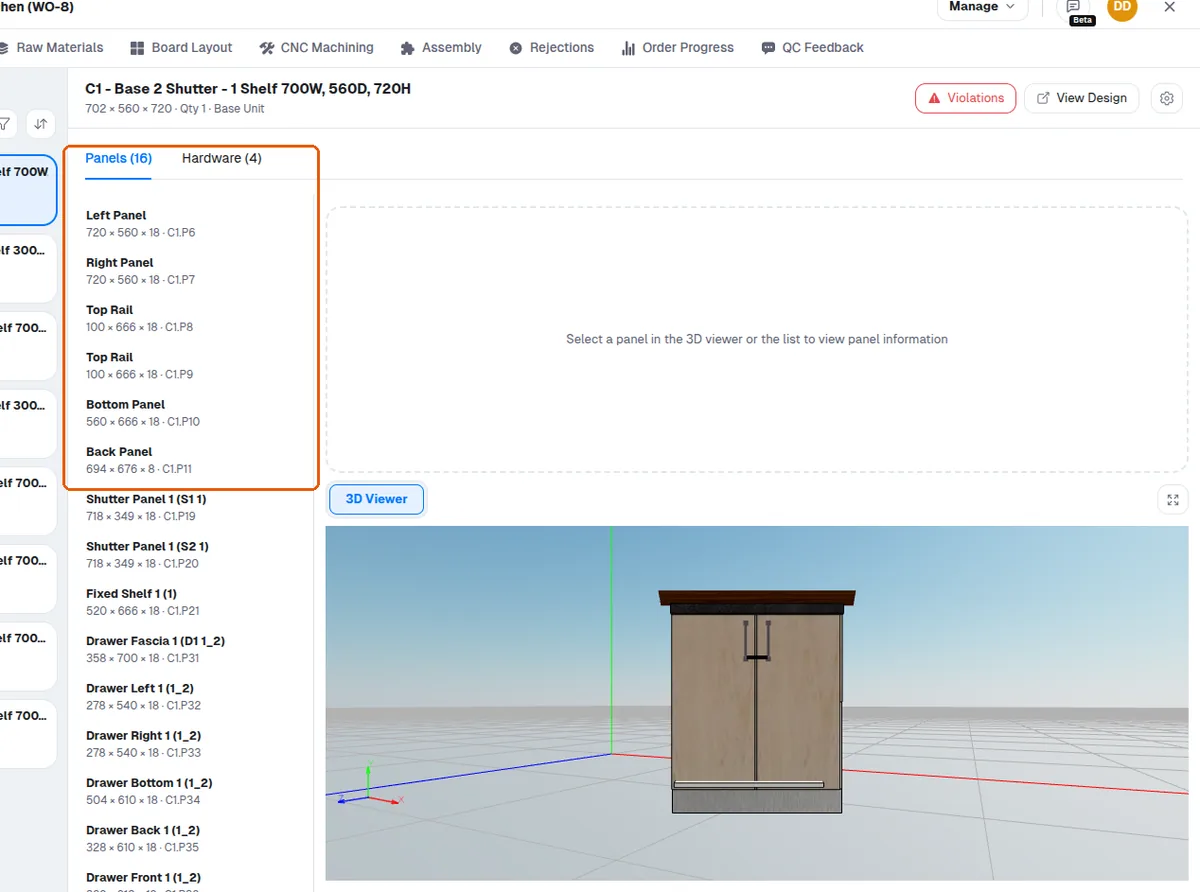
בחירת לוח מהרשימה או מתצוגת התלת-ממד מציגה את פרטיו (פסי קצה, מידות, חומרים, כיוון סיב) ומדגישה אותו במודל התלת-ממדי.
✓ נבדק במוצר ב-19 באוקטובר 2026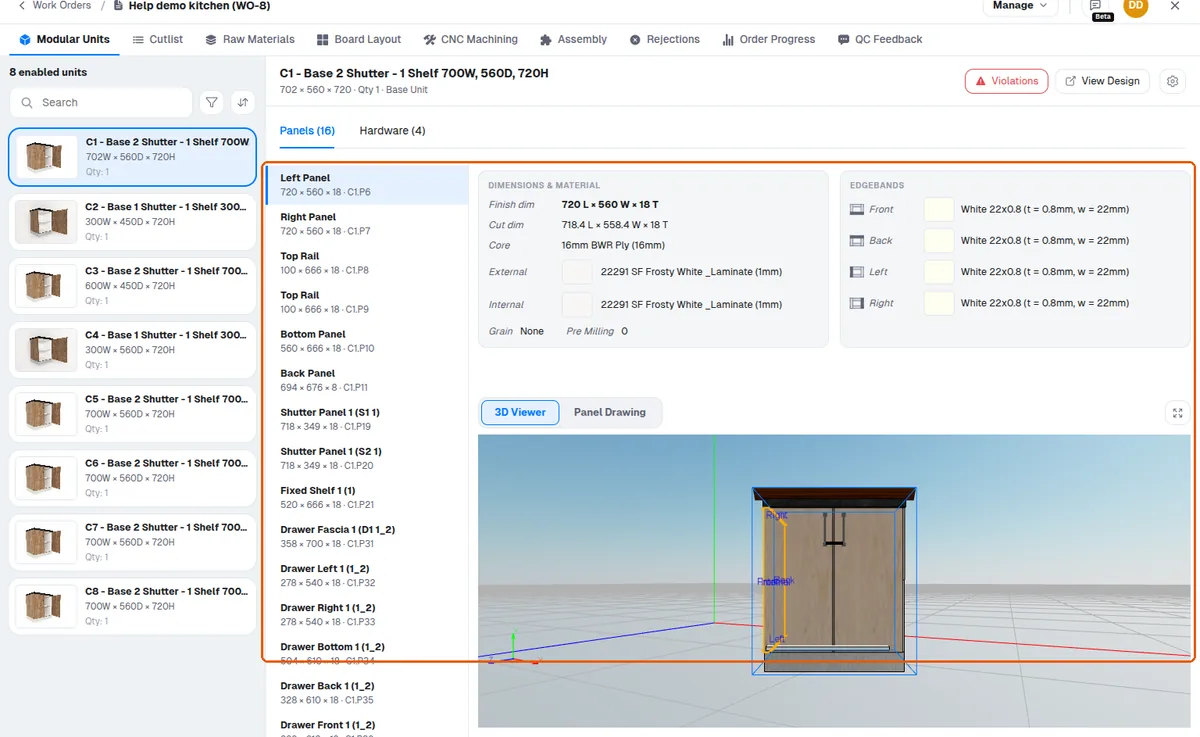
כאשר לוח נבחר בתצוגת Modular Units, הלוח מודגש ומוצגת שרטוט דו-ממדי של הקידוח שלו כדי שהמפעיל יוכל לאמת אותו.
בעמוד Modular Units של הזמנת העבודה של MES portal, שרטוט הלוח הוא התצוגה המשמשת לבדיקת אופן ההרכבה של הארונית.
בעמוד Modular Units של הזמנת העבודה, עם לשונית 'Panel Drawing' פתוחה בתצוגה, בחירת לוח מציגה את השרטוט שלו, שאותו המפעיל יכול להגדיל בגלגלת העכבר כדי לאמת פרטים כגון חריצים לפני החיתוך.
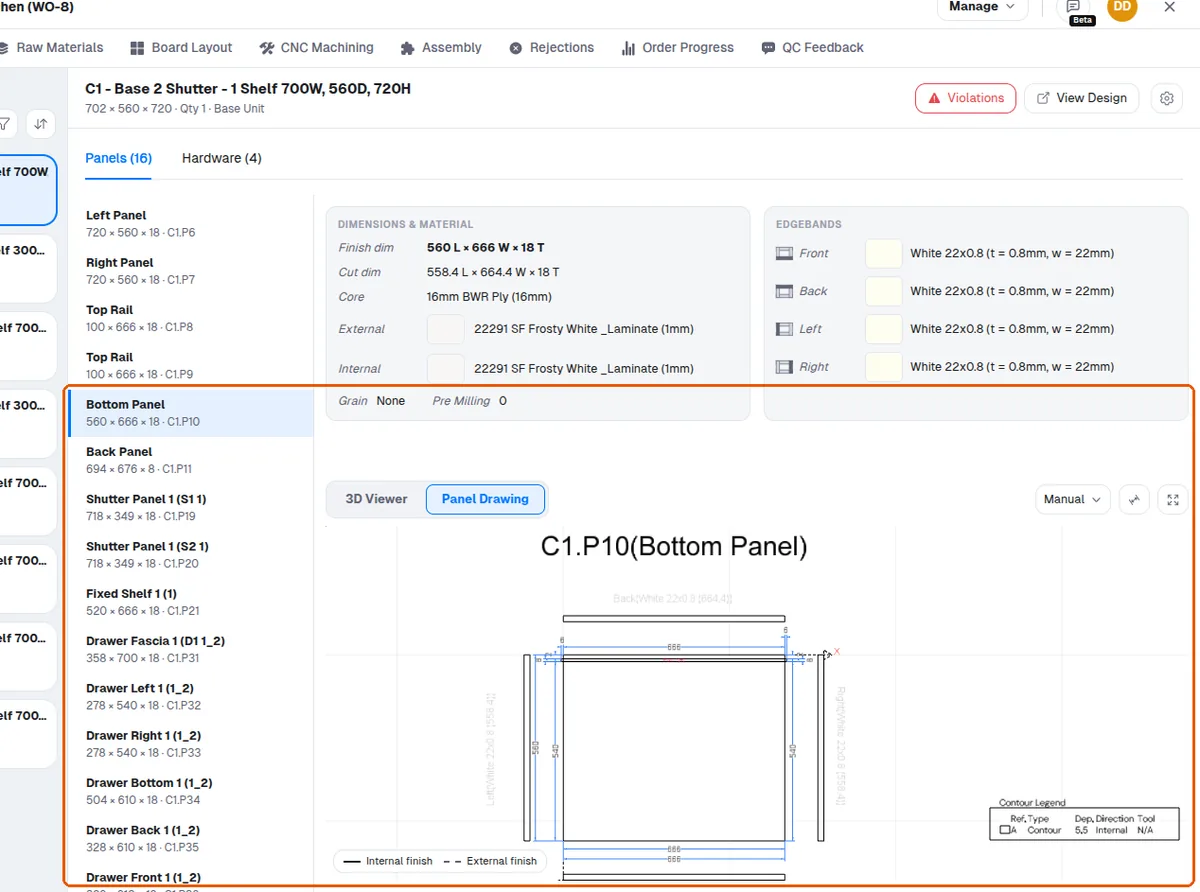
ניתן לפתוח את שרטוט הלוח כדי לבדוק פרטי קידוח.
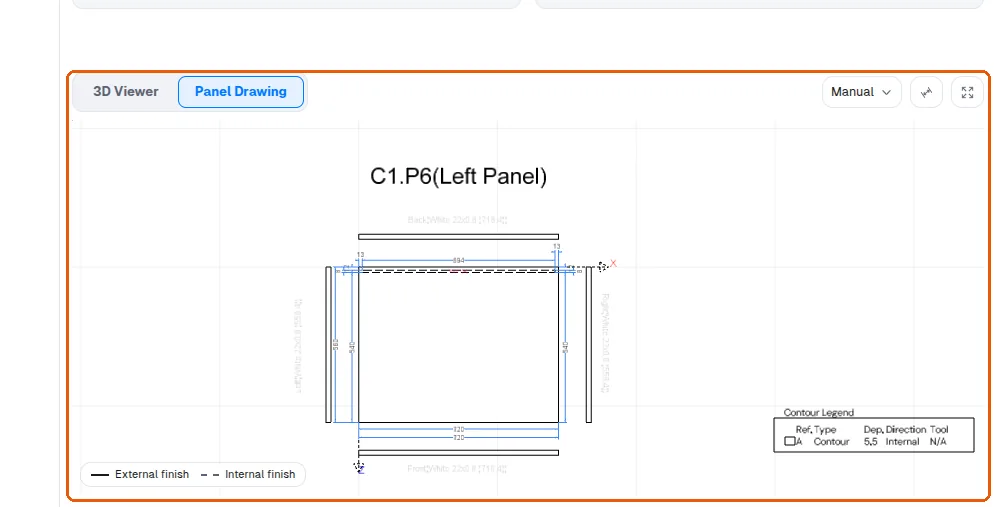
ניתן לבחור את מכונת העיבוד מסרגל הכלים של שרטוט הלוח בתצוגת החומרה/לוח. לאחר הבחירה, המכונה שנבחרה נשמרת ומוחלת מחדש על כל לוח שעובדים עליו. בורר המכונה זמין רק כאשר MES Pro מופעל.