تعرّف على علامة تبويب Modular Units Hardware
اطّلع على ما تعرضه علامة تبويب Hardware لكل خزانة، وكيف تُجمَّع الصفوف، وكيف تتحقق من تفاصيل ثقب الألواح.
In a work order's Modular Units page, each unit has two tabs: Panels (default) and Hardware, with the tab label showing the live count, e.g. 'Hardware (12)'. The Hardware table columns are Sno, Sku Name, Serial Number, Model Number, Dimension, Qty, Unit, Source and Details. Rows are grouped: the same SKU with the same dimension and the same source becomes one row, and the Details column concatenates every distinct reference that contributed (for example all connector applicators or panels using that SKU, comma-separated; long values are truncated with a hover tooltip). Length-based hardware such as skirting or profiles shows total consumed length rather than piece count, so it matches the Raw Materials output. Hardware sold in sets (per-set SKUs) is counted in sets rather than pieces, so the per-unit figures add up to the Raw Materials totals. Only units marked for production appear on the page at all — a 'missing cabinet' here usually just isn't marked for production. An empty tab shows a 'No hardware' placeholder with the message 'This unit has no hardware items.' The 3D viewer pane is not rendered at all while the Hardware tab is active. The list also respects the work scope: hardware on out-of-scope elements is not counted. Serial Number is the SKU's ERP code from the catalog.
في صفحة Modular Units الخاصة بأمر العمل، تسرد علامة تبويب Panels لكل خزانة ألواحها الفردية (يسار، يمين، أسفل، خلف، عارضة علوية، إلخ).
✓ تم التحقق منه في المنتج في 19 أكتوبر 2026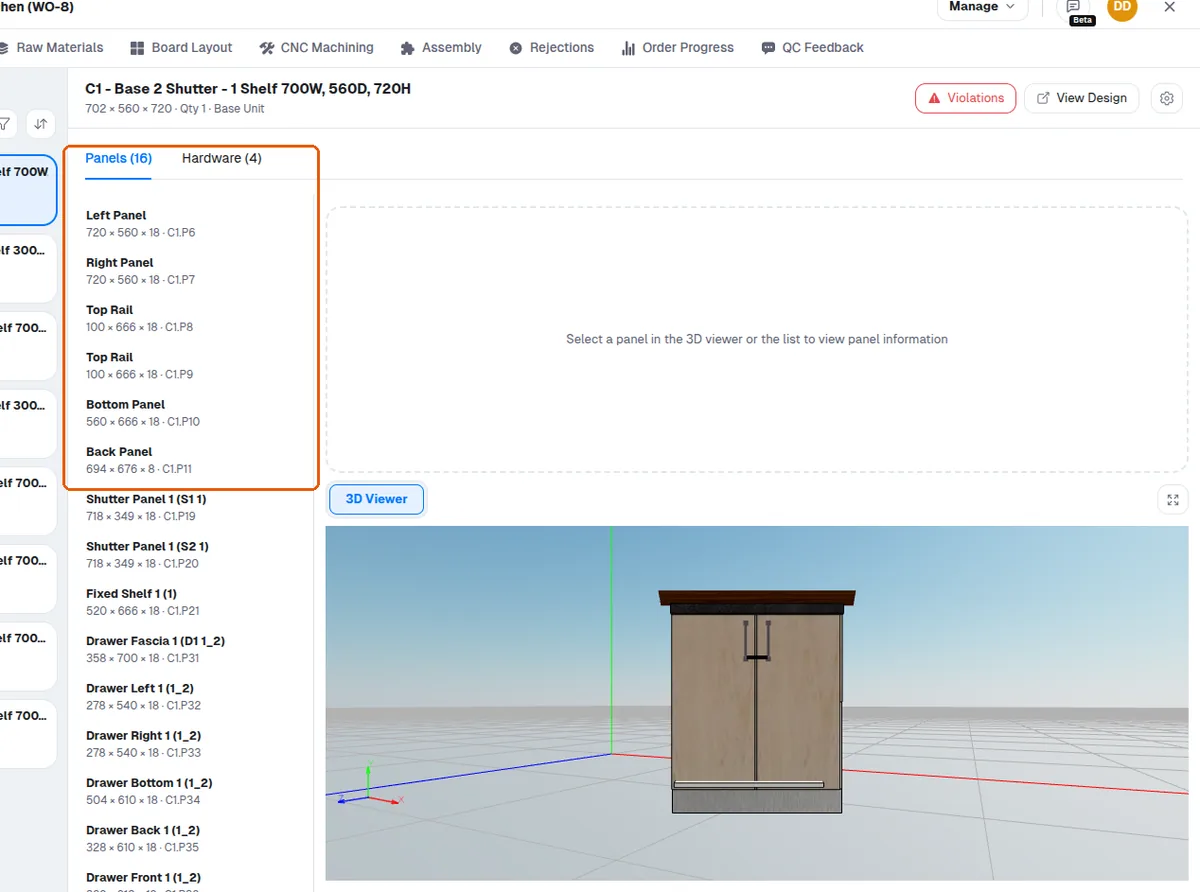
يؤدي اختيار لوح من القائمة أو من عرض 3D إلى عرض تفاصيله (أشرطة الحواف، المقاسات، المواد، اتجاه العرق) وإبرازه في نموذج 3D.
✓ تم التحقق منه في المنتج في 19 أكتوبر 2026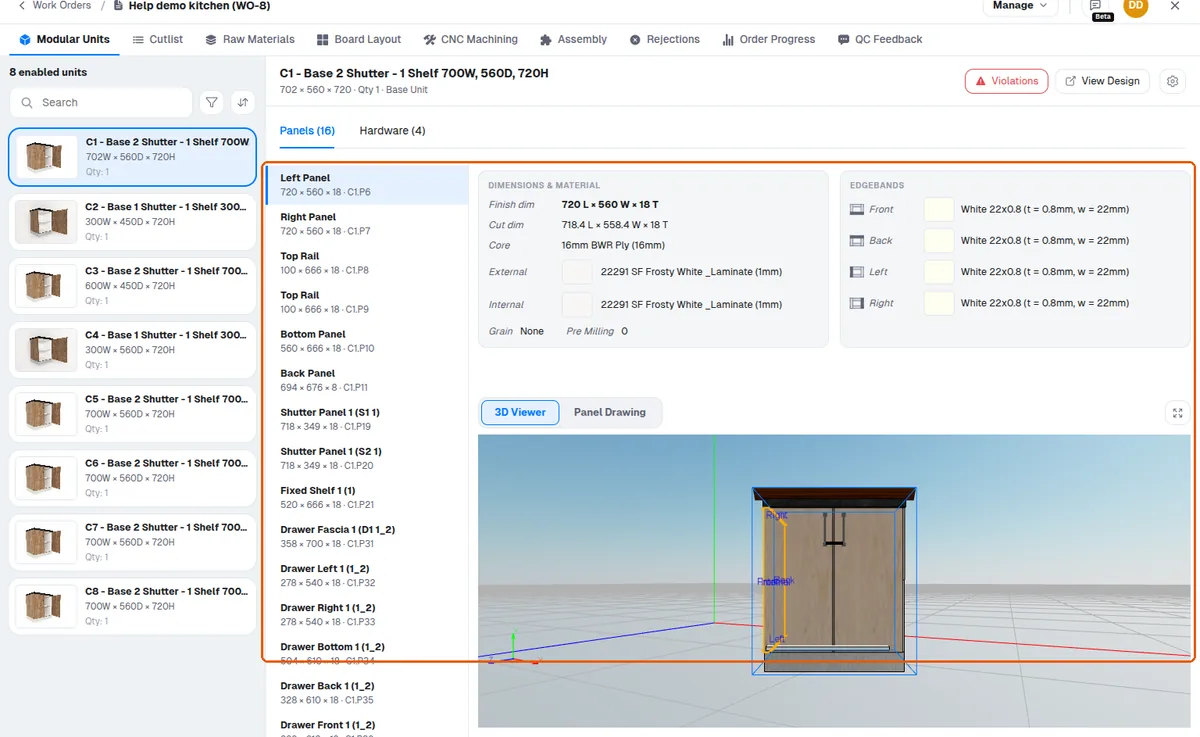
عند اختيار لوح في عرض Modular Units، يُبرز اللوح ويُعرض رسم ثنائي الأبعاد لثقبه ليتحقق منه المشغّل.
في صفحة Modular Units الخاصة بأمر عمل MES portal، يكون رسم اللوح هو العرض المستخدم للتحقق من كيفية تجميع الخزانة.
في صفحة Modular Units الخاصة بأمر العمل، مع فتح علامة تبويب 'Panel Drawing' في العارض، يؤدي اختيار لوح إلى عرض رسمه، ويمكن للمشغّل تكبيره بعجلة الفأرة للتحقق من تفاصيل مثل المجاري قبل القطع.
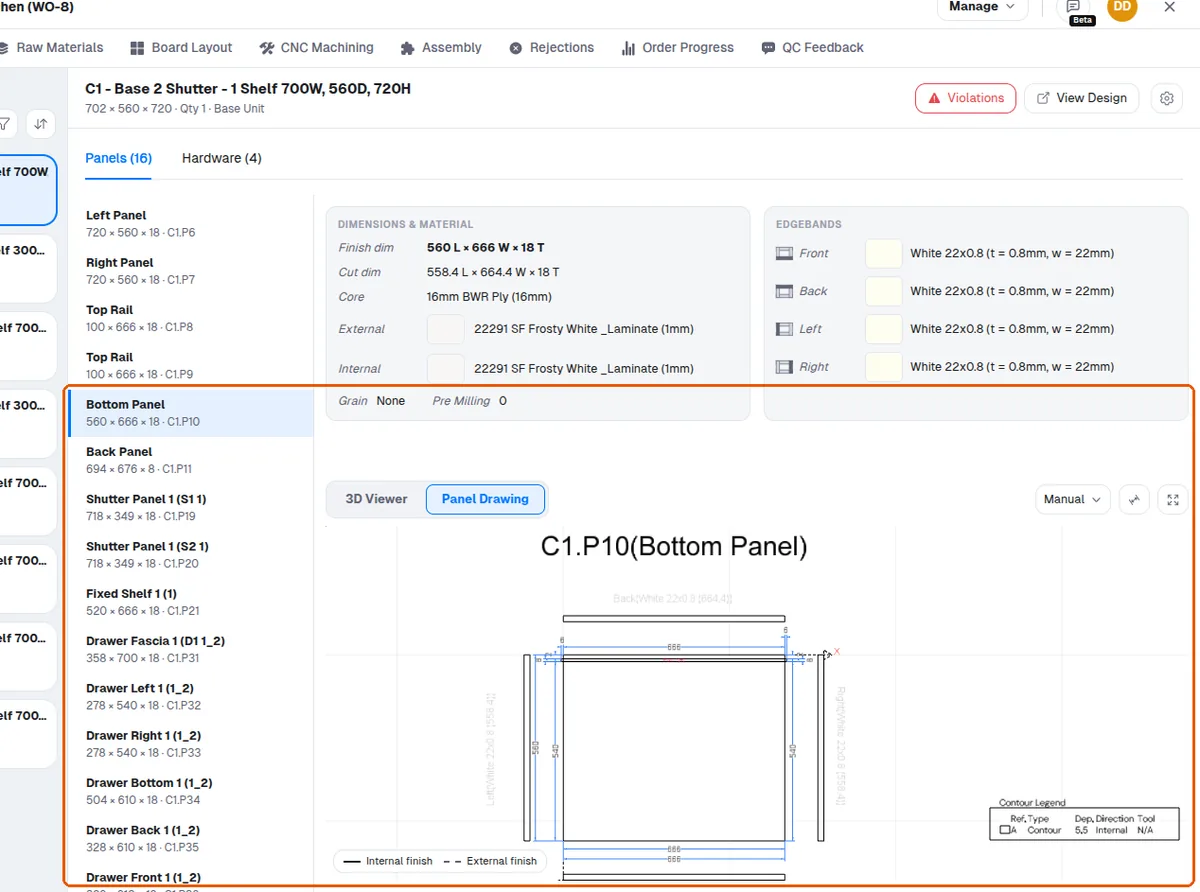
يمكن فتح رسم اللوح للتحقق من تفاصيل الثقب.
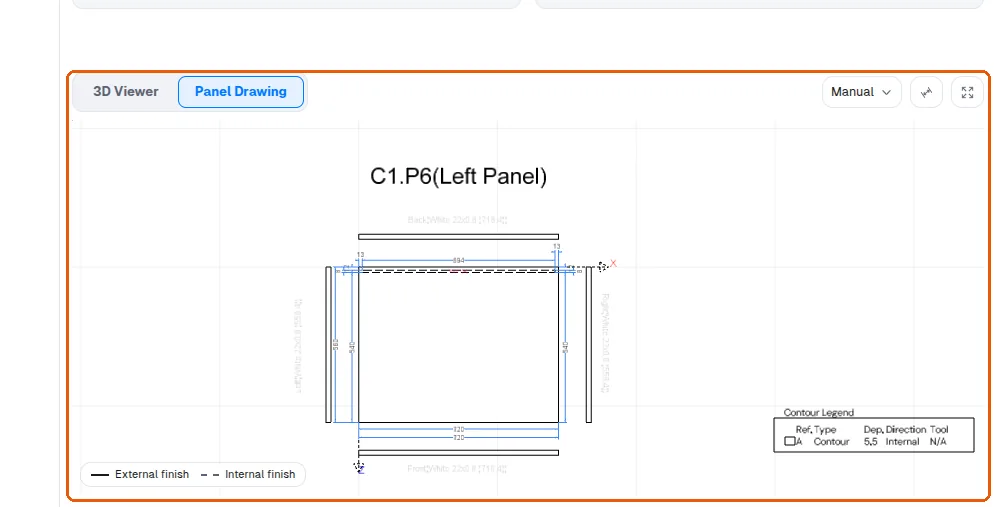
يمكن اختيار آلة التشغيل من شريط أدوات رسم اللوح في عرض العتاد/الألواح. بعد الاختيار، تُحفظ الآلة المختارة وتُعاد تطبيقها على كل لوح تعمل عليه. لا يتوفر محدّد الآلة إلا عند تفعيل MES Pro.