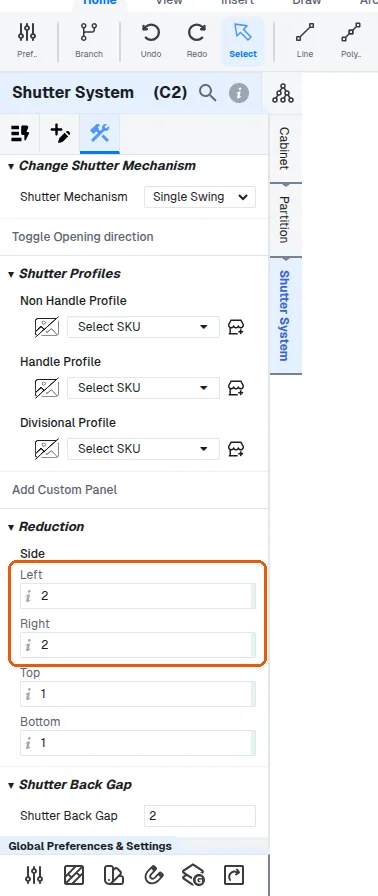
Change shutter reductions per side
Enter reduction amounts on the left, right, top and bottom shift fields to resize a shutter.
The shutter system's left, right, top and bottom shift fields accept the reduction amount directly (e.g. entering 2 reduces that side by 2), and the shutter dimension updates to the new value.
✓ Проверено в продукте 10 октября 2026 г.The left and right reduction values can be changed from 1 to 1.5 (or any other amount) in the shutter system's construction settings, and the same reduction can be applied to all four sides (top, bottom, left and right) at once.
To extend a shutter by a fixed amount (for example 20 mm on the bottom for a handleless door), enter the amount as a negative value in that side's reduction field — e.g. minus 20 on the bottom side — because the field is a reduction parameter.
✓ Проверено в продукте 10 октября 2026 г.To drop a shutter by a specific amount (for example 20 mm), set that side's reduction value in the shutter system's construction settings, which overrides the default reduction for that side.
✓ Проверено в продукте 9 октября 2026 г.Entering a negative value (e.g. -50) extends the shutter in that direction instead of shrinking it.
✓ Проверено в продукте 9 октября 2026 г.To reduce a shutter's height, select the shutter and set the bottom reduction in the shutter system's construction settings (for example 25 mm off the bottom); this is the correct route rather than editing the panel directly.
The left and right reduction fields are found under the shutter's panel-level construction, in Shutter Systems > Construction, in the Reductions section; the shutter size recalculates from the values entered there.
✓ Проверено в продукте 22 октября 2026 г.